Greek Yogurt Bagels Baked
Uitgelicht onder: Bakplezier
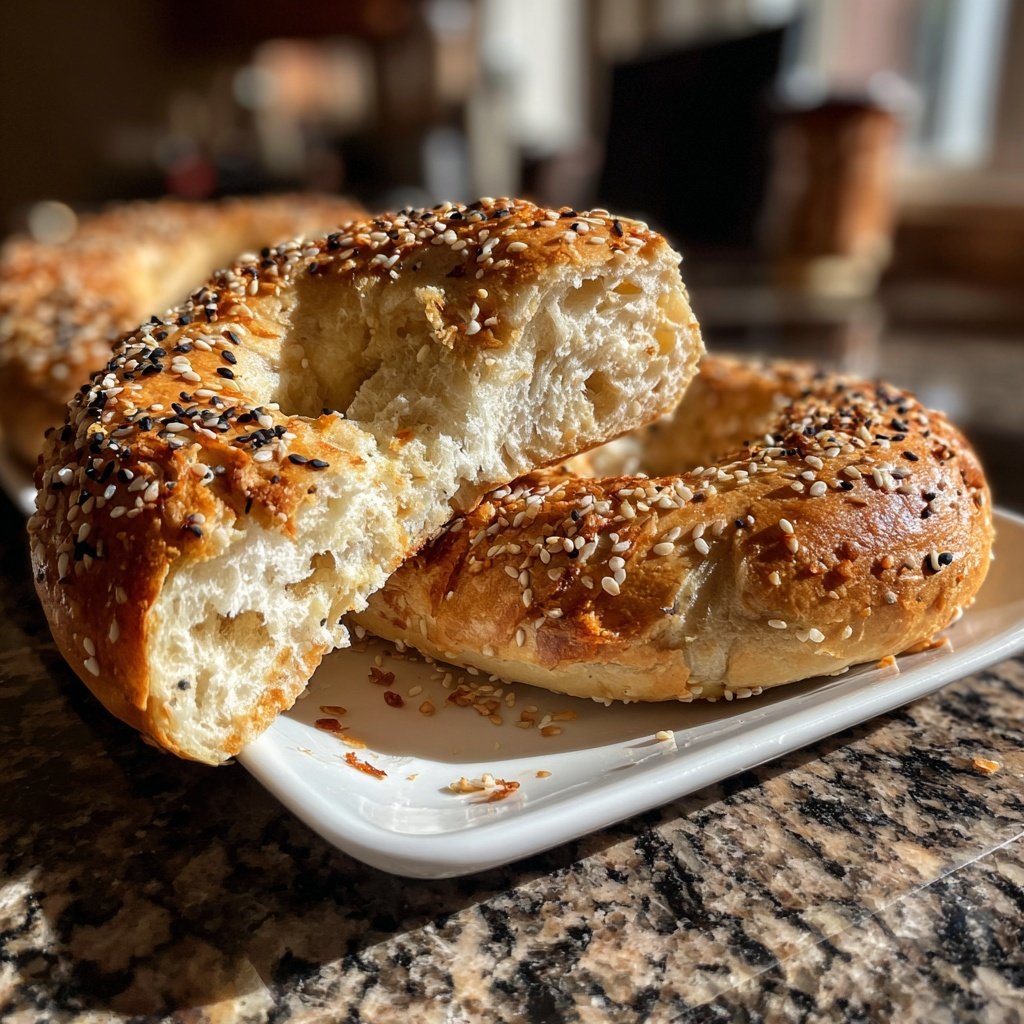
I love making Greek Yogurt Bagels Baked because they're not only easy to whip up but also have a delightful texture and flavor. The combination of Greek yogurt and flour creates a dough that's both simple and satisfying. I enjoy experimenting with toppings like sesame or everything bagel seasoning to personalize each batch. These bagels are perfect for breakfast or a quick snack, and they pair wonderfully with cream cheese or smoked salmon. Once you try this recipe, you'll see how fun and rewarding bagel-making can be!
When I first tried baking bagels at home, I was surprised at how easy it actually was with Greek yogurt. The dough comes together quickly, and the bagels bake to a lovely golden brown. I remember the first time I added a dash of garlic powder to the mixture, which enhanced the flavors beyond what I expected.
Perfecting the boiling step before baking made a significant difference in the texture, giving them that authentic bagel chewiness. Now, I always make sure to boil each bagel briefly. It feels like a small step, but it transforms an ordinary bagel into something extraordinary!
Why You'll Love This Recipe
- Simple ingredients bring amazing flavor together.
- The Greek yogurt gives a protein boost, making it a healthier option.
- Perfectly chewy texture that rivals any store-bought bagel.
Understanding the Ingredients
The primary ingredients in these Greek Yogurt Bagels—flour and yogurt—play essential roles in creating both texture and flavor. All-purpose flour serves as the base, providing structure, while Greek yogurt not only adds moisture but also contributes a distinct tanginess. This flavor is particularly pleasant, balancing out the dough's natural sweetness. If you prefer a more complex flavor, consider using a bread flour that has higher protein content, giving your bagels that perfect chew you crave.
Additionally, incorporating baking powder into the mix helps the bagels rise slightly, ensuring they aren't too dense. The salt enhances flavor and balances the natural sweetness of the dough. Be sure to measure ingredients accurately; overly generous amounts of flour can lead to dry bagels, while too little yogurt can result in a sticky mess. Keeping a consistent ratio is key to achieving that ideal chewy texture.
Mastering the Bagel Shape
Shaping your bagels correctly contributes significantly to their final appearance and texture. After dividing the dough into equal portions, rolling each piece into a ball and then forming the hole in the center allows for uniform cooking. A common mistake is creating holes that are too small; remember, they will close up while boiling and baking. An ideal hole size is about 1-2 inches wide to ensure they don’t seal completely during preparation.
If you find the dough too sticky during shaping, lightly dust your hands and the surface with flour to prevent it from adhering. On the other hand, if your dough feels too dry, a sprinkle of water can help bring it back to the right consistency. The shaping process is both fun and rewarding—watching the evolution from simple dough to perfect bagels is satisfying!
Storage and Serving Suggestions
Once baked, allow your bagels to cool completely on a wire rack to prevent them from becoming soggy. They can be enjoyed immediately or stored in an airtight container for up to 3 days. For longer storage, consider freezing them—simply wrap each cooled bagel in plastic wrap and place it in a zip-top freezer bag. To enjoy later, just pop them in the toaster right from the freezer for a quick revival of those chewy, freshly baked flavors.
For serving, the versatility of these bagels is fantastic. Try them with traditional cream cheese, butter, or avocado spread for breakfast. For a more substantial meal, layer on smoked salmon and capers for an elevated brunch option. If you like experimenting, consider adding various toppings before baking, like cheese or herbs, to create unique flavor profiles with each batch!
Ingrediënten
Gather the following ingredients to get started:
Ingredients
- 2 cups all-purpose flour
- 1 cup Greek yogurt
- 1 teaspoon baking powder
- 1 teaspoon salt
- 1 egg (for egg wash)
- Toppings (sesame seeds, poppy seeds, everything bagel seasoning, etc.)
Once you have your ingredients ready, you're set to create these delicious bagels!
Bereidingswijze
Follow these steps to make your baked bagels:
Prepare the Dough
In a large bowl, mix together the flour, baking powder, and salt. Gradually add the Greek yogurt, stirring until a dough forms. Knead the dough on a lightly floured surface for about 2-3 minutes until smooth.
Shape the Bagels
Divide the dough into 8 equal pieces. Roll each piece into a ball, then use your thumb to make a hole in the center to form a bagel shape. Repeat with all pieces.
Boil the Bagels
Bring a large pot of water to a boil. Lower the heat and gently boil each bagel for about 1 minute on each side. Remove with a slotted spoon and let drain.
Bake the Bagels
Preheat the oven to 375°F (190°C). Brush the top of each bagel with beaten egg and sprinkle with your desired toppings. Bake for 20 minutes or until golden brown.
Allow the bagels to cool slightly before enjoying them with your favorite spreads!

Professionele Tips
- Experiment with different toppings to find your favorite flavor. You can also try adding herbs or spices directly to the dough for extra flavor.
Troubleshooting Common Issues
If your bagels end up too tough, it may be due to over-kneading the dough. The goal is to knead just until smooth, usually around 2-3 minutes. Kneading longer than necessary can develop too much gluten, leading to a rubbery texture. If you face this issue, gently adjusting your kneading time in future batches can make a significant difference.
In case your bagels are flatter than expected, check to ensure that your dough rose adequately during the boiling step. Boiling helps develop that signature chewy crust. An insufficient boil can lead to bagels that lack the classic shape and texture. Make sure to boil each bagel for a full minute on each side to achieve the best result.
Ingredient Substitutions
For those on a gluten-free diet, substitute the all-purpose flour with a gluten-free blend that includes xanthan gum, ensuring it provides the right structure. Not all gluten-free flours behave the same, so selecting one that is formulated for baking will yield better results. Keep in mind that the flavor could differ slightly, so taste testing after baking is essential to find your ideal balance.
If you're looking to reduce calories, consider opting for plain low-fat yogurt instead of regular Greek yogurt, though this may slightly alter the texture. Alternatively, you can add flaxseed meal to enhance the nutrition without adding too many calories, giving your bagels a delightful nutty flavor.
Making Bagels Ahead of Time
For those busy mornings, preparing dough in advance is a great strategy. You can prepare the dough up to a day before; simply store it in the refrigerator, tightly wrapped. Be sure to let it come to room temperature for about 30 minutes before shaping to make it easier to work with. This allows you to enjoy freshly baked bagels with minimal effort in the morning.
If making a larger batch, the recipe can easily be doubled or tripled. Just be cautious of mixing in larger bowls to prevent spills. Additionally, keep an eye on baking time, as a larger volume can lead to variations in cooking time. A good rule of thumb is to test one bagel for doneness before removing the whole batch from the oven.
Vragen Over Recepten
→ Can I use whole wheat flour?
Yes, you can substitute whole wheat flour for all-purpose flour, but the texture may be denser.
→ How should I store the leftover bagels?
Store the bagels in an airtight container at room temperature for up to 3 days or freeze for longer storage.
→ Can I make these bagels ahead of time?
Yes! You can prepare them the day before and store them in the refrigerator after baking.
→ What can I serve with these bagels?
They pair great with cream cheese, lox, or even avocado for a delicious breakfast!
Greek Yogurt Bagels Baked
Gemaakt door: Grace Walker
Recepttype: Bakplezier
Vaardigheidsniveau: Intermediate
Eindportie: 8 bagels
Wat je Nodig Hebt
Ingredients
- 2 cups all-purpose flour
- 1 cup Greek yogurt
- 1 teaspoon baking powder
- 1 teaspoon salt
- 1 egg (for egg wash)
- Toppings (sesame seeds, poppy seeds, everything bagel seasoning, etc.)
Stappen
In a large bowl, mix together the flour, baking powder, and salt. Gradually add the Greek yogurt, stirring until a dough forms. Knead the dough on a lightly floured surface for about 2-3 minutes until smooth.
Divide the dough into 8 equal pieces. Roll each piece into a ball, then use your thumb to make a hole in the center to form a bagel shape. Repeat with all pieces.
Bring a large pot of water to a boil. Lower the heat and gently boil each bagel for about 1 minute on each side. Remove with a slotted spoon and let drain.
Preheat the oven to 375°F (190°C). Brush the top of each bagel with beaten egg and sprinkle with your desired toppings. Bake for 20 minutes or until golden brown.
Extra Tips
- Experiment with different toppings to find your favorite flavor. You can also try adding herbs or spices directly to the dough for extra flavor.
Voedingswaarde (Per Portie)
- Calories: 220 kcal
- Total Fat: 4g
- Saturated Fat: 1g
- Cholesterol: 50mg
- Sodium: 400mg
- Total Carbohydrates: 38g
- Dietary Fiber: 2g
- Sugars: 1g
- Protein: 9g